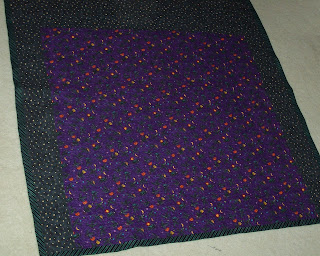
Searching through my stash one day last fall, I came across a Halloween print featuring children dressed in a variety of costumes: vampires, cowgirls, pirates and princesses! It was so cute, that I thought it should be put it a whimsical, child-like quilt! At the same time, I was working through Coffee-Time Quilts (by Cathy Wierzbicki), a quilting book featuring coffee-inspired quilts and quilted projects as well as coffee related recipes. I happened across the Cappuccino Crossroads pattern (pg. 28) which features blocks of print, Nine Patch blocks and Rail Fence blocks. The original pattern features four fabrics; a print, a light, medium and dark. It seemed that this could be the perfect pattern to use for the Halloween print, except that my fabric stash didn’t include enough of one particular color way for all the blocks. For this reason, I chose to break the quilt up into sections of green, orange and purple.
To keep the quilt from becoming too much of a color-splotion, I bordered the blocks with a sparkly black over which I hand appliquéd the “Trick or Treat” and the Halloween objects. I printed up some patterns using Microsoft Word’s Cooper Black font at 400 pt. for the text, and then surfed the internet for fun Halloween images. These patterns seemed to work really well, and (best of all) were free! To finish them, I did a blanket stitch around the edges in different colors using DMC embroidery thread. (In hindsight, I would have done the appliqué on the black strips and squares before sewing the border on to the quilt; the border seemed to be distorted perhaps because of the tensions I put on it when doing the hand sewing).
The quilting was done using a free-motion foot, and features pumpkins and leaves on the body of the quilt, and stars on the borders. I had the idea for both designs from The Free Motion Quilting Project (a fantastic blog by Laura Day) which has a wide variety of free-motion designs and tutorials in varying difficulties. I’ve really come to enjoy free-motion quilting, except that when I’m at it for too long, my back really hurts (not sure if this is because my sewing table is at the wrong height or if I have a bad chair).
The binding bias tape is from a striped green and black fabric (courtesy of my mom’s fabric stash; guess how big it is! Hint: the sign over her stash reads “She who dies with the most fabric wins”). I’ve lately found myself making all the bias tape bindings for my projects; I think they give a more original touch than using Wright’s and sometimes it’s cheaper (if you find a good sale fabric). Once you’ve got the knack for cutting the strips for the tape, it becomes a simple matter of sewing them together, and then slapping it on the quilt!
I suppose that before I call the quilt finished, I should stick a label on it (although I kind of want to wait to title it until I know what I’m going to do with it). This has been drummed into my head for years by my mother and her quilter/appraiser friend; knowing who, where and when a quilt was created adds to its value. However, once the binding is done, I’m not very motivated to add anything more to it.
The backing fabric features a purple Halloween crow print (the crows have little hats and carry pumpkin buckets!) and the same star print as is used for the cat applique. Both fabrics are thanks to my mom's stash again (she has so much fabric!). It all makes for a finished quilt of 59 ½ inches squared Haloween fun!


No comments:
Post a Comment